UPDATE 07/18/2025: PLEASE DISREGARD THE POST ON THIS PAGE – IT IS NOT THE BEST WAY TO DO THIS. PLEASE SEE THE NEWER POST HERE INSTEAD!!!:
OLD POST – DON’T FOLLOW IT, BUT I’M LEAVING IT HERE FOR THE RECORD:
There are some hoops to jump through when installing DaVinci Resolve on a Linux machine, but the freedom and power that comes with Linux makes it much worthwhile! I’ve built myself a custom computer for 4K video editing, and I was able to install the BlackMagic DaVinci Resolve Studio 20 on it on top of AlmaLinux 10. Due to how much effort it takes to make it work, I wanted to help others by sharing how I was able to do this.
DISCLAIMER: this article is provided in the hope that it should be useful. However, NO WARRANTY is made whatsoever. The author (Ruvim) is not liable for any consequence. Please PROCEED AT YOUR OWN RISK.
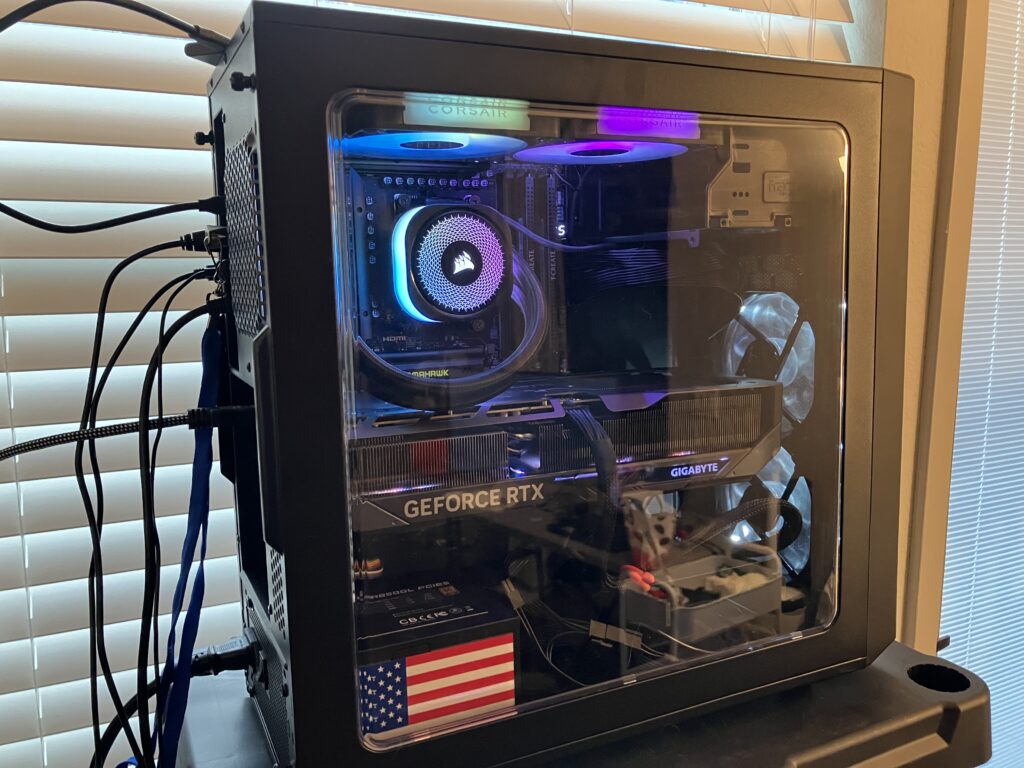
Photo: my PC build so far. I plan to still add an optical disk drive and an SD card reader into the two external drive bays, but otherwise it’s finished.
For the parts list that I used, please see here:
https://pcpartpicker.com/user/ruvimk/saved/#view=YDmw7P
(Note: I don’t earn any commission for the above link; I’m not that fancy yet, lol.)
Plasma workspace (optional)
First of all, I hate the new GNOME UI – it’s so difficult to work with. My first step was to install the KDE Plasma workspace, which can be done by opening a terminal, entering root, and running the appropriate commands:
su

dnf -y install epel-release && dnf -y update && dnf --enablerepo=epel group && dnf config-manager --set-enabled crb && dnf -y groupinstall "KDE Plasma Workspaces" && reboot
Once it reboots, select “Plasma” as the workspace (gear icon on the lower-right of the screen) after clicking on the username but BEFORE typing the password to log in.
Some GUI settings
Some settings to keep in mind that I used, but you may or may not need – just a reminder list of items to consider:
- Mouse & Touchpad – ensure the scrolling direction is the way you’d like (for me, I had to reverse it to scroll the right way).
- Bluetooth – if pairing mouse/keyboard, click on “Configure” on the top-right, and ensure the radio button is set to “On login: Enable Bluetooth” so that it doesn’t turn off Bluetooth randomly when you log in the next time.
- Screen Locking: Lock screen automatically: Never.
- Power Management:
- When inactive: do nothing.
- Dim automatically: never.
- Turn off screen: never.
The power settings are perhaps useful to avoid problems with the GPU powering down when the monitor turns off. More on this later, but I’m still figuring out how to resolve that. For now, I’ve figured out how to make it work *without* the monitor ever turning off, and as soon as the monitor turns off, the system powers down the GPU and doesn’t power it back up when the monitor is turned back on again … I will update this post if I figure out a solution, but, for now, just do whatever is necessary to always keep the screen on when you’re using the GPU.
Download and install NVIDIA driver
Go to nvidia.com and download the GPU driver for Linux 64-bit. Be sure you do NOT select “aarch64” as that is for the ARM chip. What we want is just the regular AMD or Intel x86_64 (“64-bit”) variant of the driver.
This one should work:
https://www.nvidia.com/en-in/drivers/details/247729/
Next, install some prerequisites for the driver. The page here describes some of them, but I’ll describe specifically what I installed below this:
https://elrepo.org/wiki/doku.php?id=start
sudo dnf install gcc

sudo rpm --import https://www.elrepo.org/RPM-GPG-KEY-v2-elrepo.org

sudo dnf install https://www.elrepo.org/elrepo-release-10.el10.elrepo.noarch.rpm

sudo dnf install kernel-devel-matched

sudo dnf config-manager --add-repo https://raw.repo.almalinux.org/almalinux/10/devel/x86_64_v2/os

sudo dnf install xorg-x11-server-devel libglvnd-devel
The above will install prerequisites.
The NVIDIA driver installer prefers that the X window server is NOT running, so I recommend:
- Log out of the GUI session.
- Ctrl + Alt + F3 to go to a text-only console.
- Terminate the GUI (GDM), ensure any existing nvidia modules are unloaded, and install the driver.
From the text-only console (Ctrl + Alt + F3):
sudo systemctl stop gdm.service

lsmod | grep nvidia
# if there are any nvidia modules running,
# see what is using them, and unload them:
sudo rmmod nvidia_drm # etc. ...

# ***************** then to install *****************

cd ~/Downloads
chmod ugo+x NVIDIA-Linux-x86_64-570.169.run
sudo ./NVIDIA-Linux-x86_64-570.169.run
Some notes on the options:
- When it asks if you want to SIGN the module, YES, YOU WANT TO SIGN IT! Otherwise it won’t work with SecureBoot if it’s not signed, and you won’t be able to boot with the module.
- Select: Generate New Key.
- Note the path where it saves the *public* key: probably,
/usr/share/nvidia/nvidia-modsign-crt-XXXXXXXX.der - It might complain about having to guess the module path of
/usr/lib64/xorg/modules , but don’t worry about that warning – the X11 should find it still, just accept and continue. - If it asks to build legacy 32-bit support libraries, select yes.
- If it asks to rebuild initramfs or something like that, select yes.
- If it asks to run xconfig to configure xorg.conf, select NO. You can do that later after reboot.
Once the installer is done, run the mokutil in order to register the kernel module with secure boot:
sudo mokutil --import /usr/share/nvidia/nvidia-modsign-crt-XXXXXXXX.derIt will ask you to make a password. Pick a password, and remember it: you will need this password in the BIOS the next time you boot.
At this point, reboot the computer.
Please: stay WITH the computer. The BIOS will only give you like 30 seconds to “press any key to load MOK”. If you miss the 30-second window during boot, then you’ll boot into the OS without registering the MOK, and the NVIDIA driver won’t work.
The process is also described by this documentation page, where they even have some screenshots of what to expect during boot:
https://elrepo.org/wiki/doku.php?id=secureboot
Again, this is IMPORTANT because otherwise your system won’t be able to run the NVIDIA driver without the MOK installed.
Once rebooted, configure the xorg.conf for use with NVIDIA:
sudo rm -rf /etc/X11/xorg.conf
sudo nvidia-xconfig
Now reboot once again, and, chances are, the NVIDIA driver still won’t work.
Troubleshoot issues with the driver
Disable nouveau to avoid driver conflicts:
printf 'blacklist nouveau\n' | sudo tee /etc/modprobe.d/nouveau-blacklist.conf

sudo dracut --force
Just for reference, the disable nouveau instructions are also here, but the above code should work:
https://wiki.almalinux.org/series/system/SystemSeriesA03R9.html
Search through journal logs:
journalctlNote: to search, hit the / (slash) key, and then type something to search for, and then hit Enter. To go to the next result, hit the n (lowercase N) key. To scroll up/down, use J and K. Just the usual vim shortcuts (if you don’t know vim yet, PLEASE learn vim; it’s SO-O-O useful!).
Search system logs:
dmesgAn AlmaLinux bug on my computer (seen errors of this in the journalctl and a couple commands to run in the error output) was disallowing the nvidia driver from doing things, so I had to run:
su

cd /usr/bin

ausearch -c 'nvidia-modprobe' --raw | audit2allow -M my-nvidiamodprobe

semodule -X 300 -i my-nvidiamodprobe.pp
But be sure to LOOK in journalctl first BEFORE running this command. You must be sure that this is needed before you take these actions. That said, for me, journalctl had errors complaining of this, so I executed these commands, and those particular errors went away.
The following was what it was saying to me with this error:
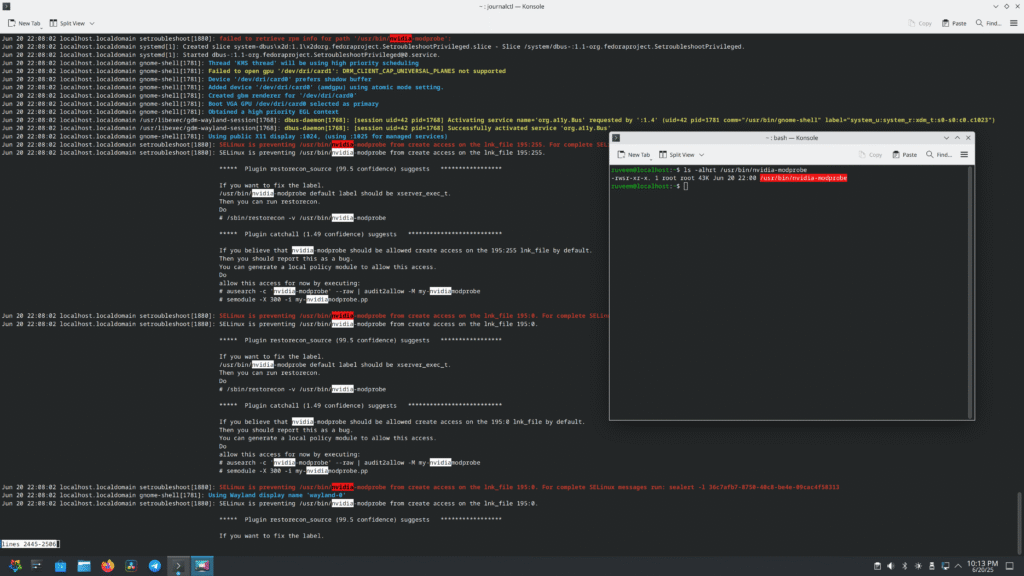
The next error was this one:
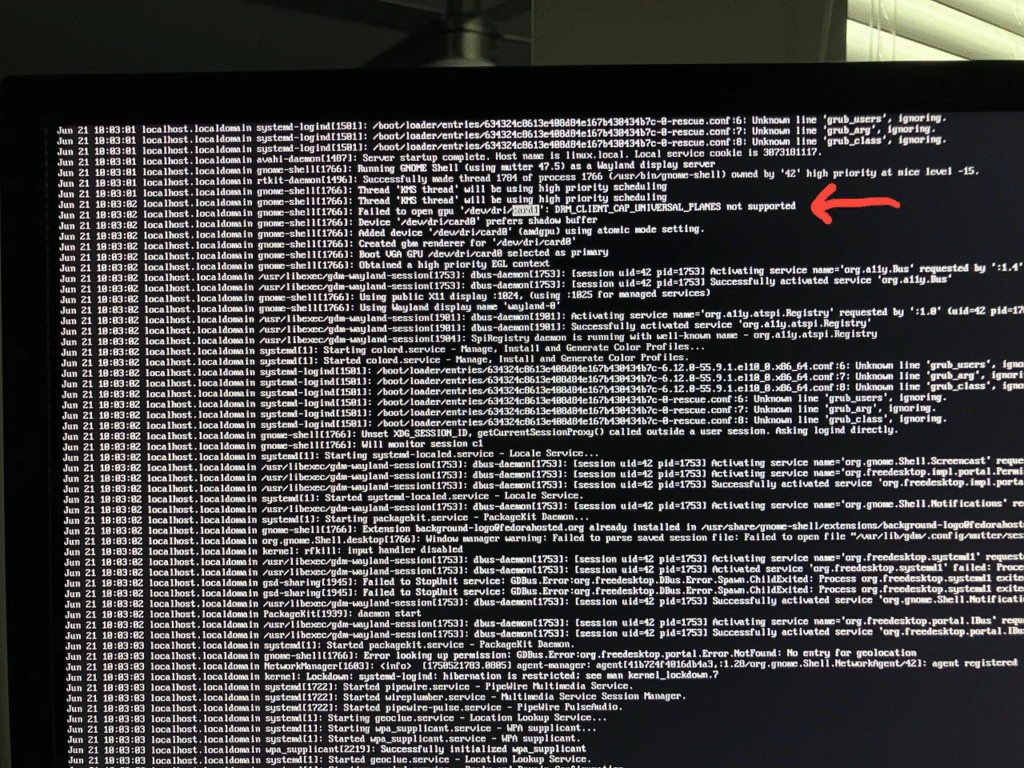
The gnome-shell said: “Failed to open gpu ‘/dev/dri/card1’: DRM_CLIENT_CAP_UNIVERSAL_PLANES not supported”.
After a LOT of googling, I finally learned that the Wayland server needs a certain DRM mode that the NVIDIA driver does not default to. Here are some links that I found useful while searching for this:
- https://www.reddit.com/r/linuxquestions/comments/1al0dlf/what_is_nvidiadrmmodeset1_and_how_can_i_add_it_to/
- https://wiki.archlinux.org/title/NVIDIA#DRM_kernel_mode_setting
- https://wiki.archlinux.org/title/Kernel_module#Setting_module_options
All that’s needed here is to configure the NVIDIA driver to use the DRM mode. First, check what mode it’s currently using:
sudo cat /sys/module/nvidia_drm/parameters/modesetChances are, it’ll print “N” meaning it’s mode 0 which is incompatible with Wayland. To change that, create this config file:
sudo vi /etc/modprobe.d/nvidia.confIn there, type the following line:
options nvidia_drm modeset=1The nvidia_drm is the kernel module that we’re configuring, and the modeset is the name of the parameter that we’re setting.
Save that file, and run this again:
sudo dracut --forceOnce that’s done, reboot the computer again.
—
Look through journalctl to see if there are any remaining issues. For me, I think that was it. Shutting the computer down, unplugging the HDMI cable from the motherboard and plugging this HDMI cable into the GPU, and starting up the computer: seems to be working now.
Uninstalling the NVIDIA driver
Please don’t uninstall it if you’re needing to use it – this is just for future reference or if you need to re-install it – but the uninstall is the same as the install but with the uninstall flag:
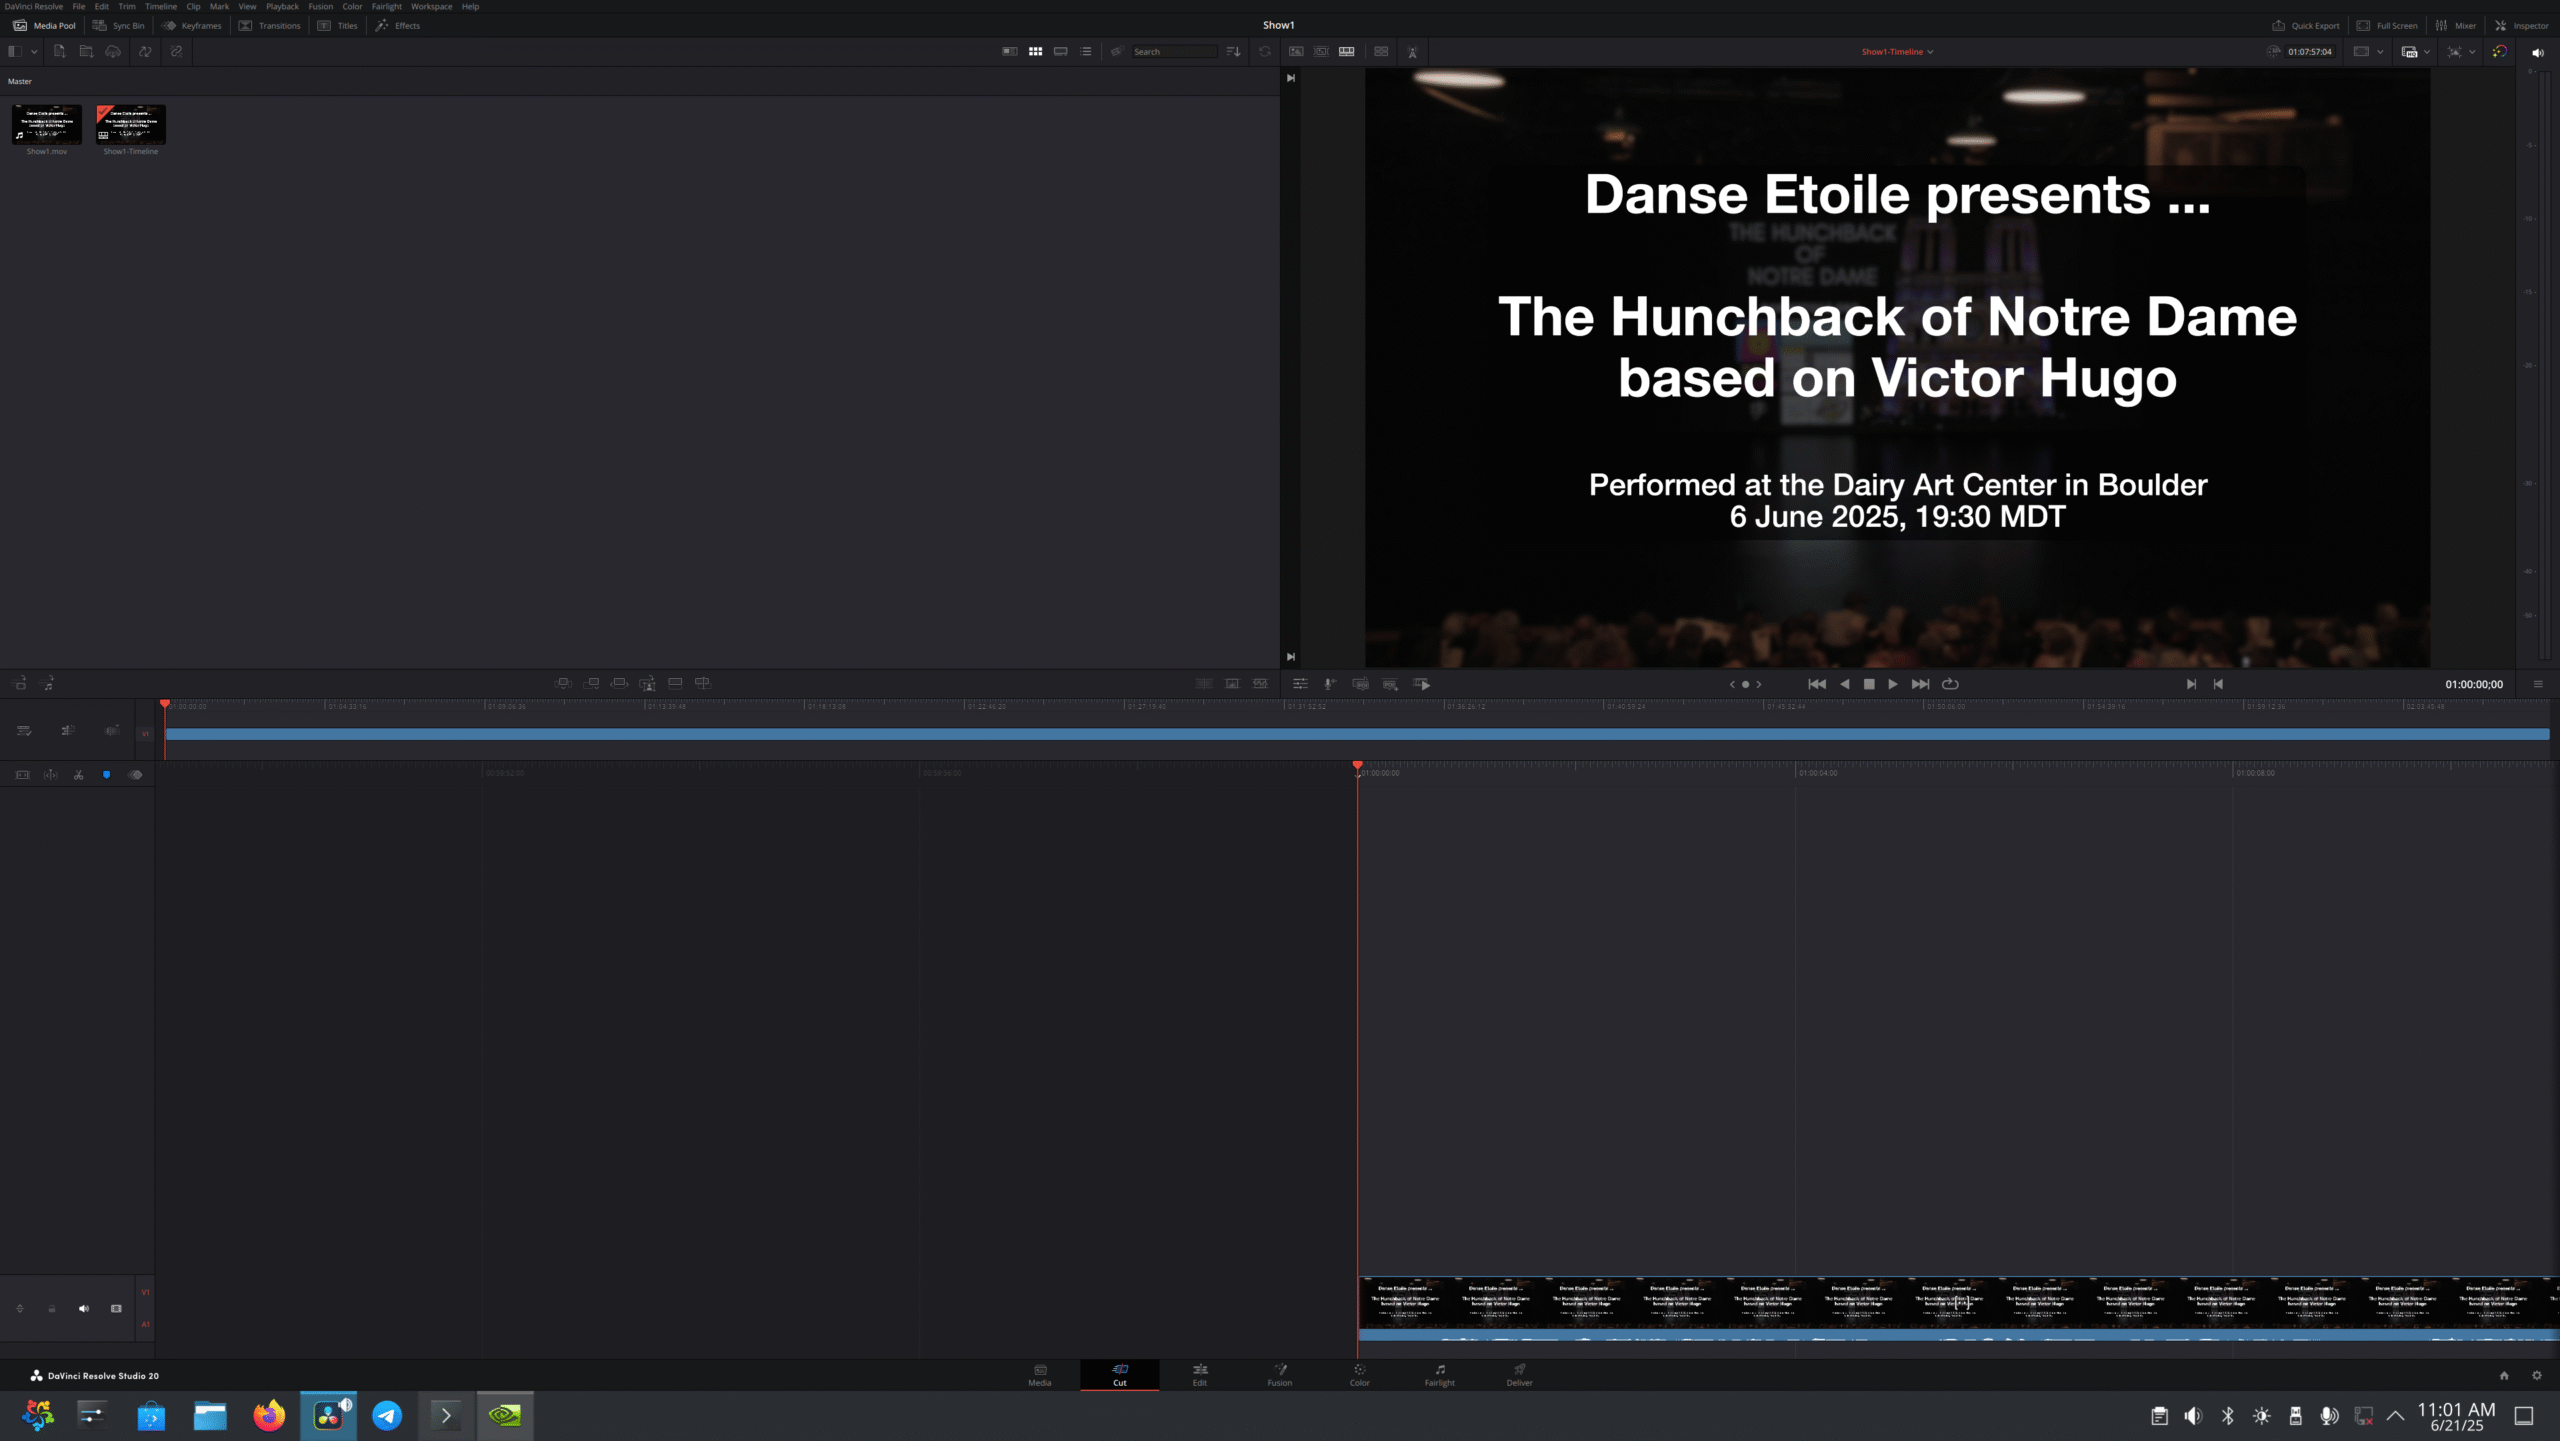
sudo ./NVIDIA-Linux-x86_64-570.169.run --uninstallDaVinci Resolve Studio 20 – install
To install DaVinci Resolve Studio, download it from the BlackMagic Design website, then install some prerequisites:
sudo dnf install apr apr-util mesa-libGLU zlib
sudo dnf install libxcrypt-compat
Unzip DaVinci Resolve, and run it:
cd ~/Downloads
mkdir DaVinci_Resolve_Studio_20.0_Linux
cd DaVinci_Resolve_Studio_20.0_Linux

unzip ../DaVinci_Resolve_Studio_20.0_Linux.tar

sudo ./DaVinci_Resolve_Studio_20.0_Linux.run -i
It should install to /opt/resolve . However, if you try to run it:
/opt/resolve/bin/resolveYou might see the error described here:
https://www.reddit.com/r/davinciresolve/comments/1d7cr2w/optresolvebinresolve_symbol_lookup_error/
The error is about resolving a symbol lookup. To fix this, you may do the following:
cd /opt/resolve/libs
su
mkdir archive
mv libgio* archive/
mv libglib* archive/
mv libgmodule* archive/
exit
After all of the above is done, DaVinci Resolve Studio should now be able to run.
GPU memory full – DaVinci Resolve
But what if you see a message like this?
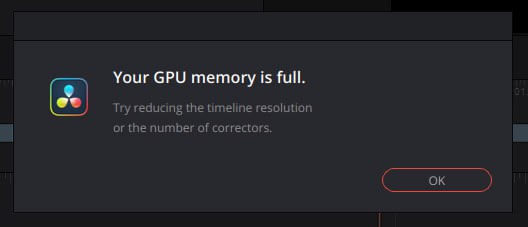
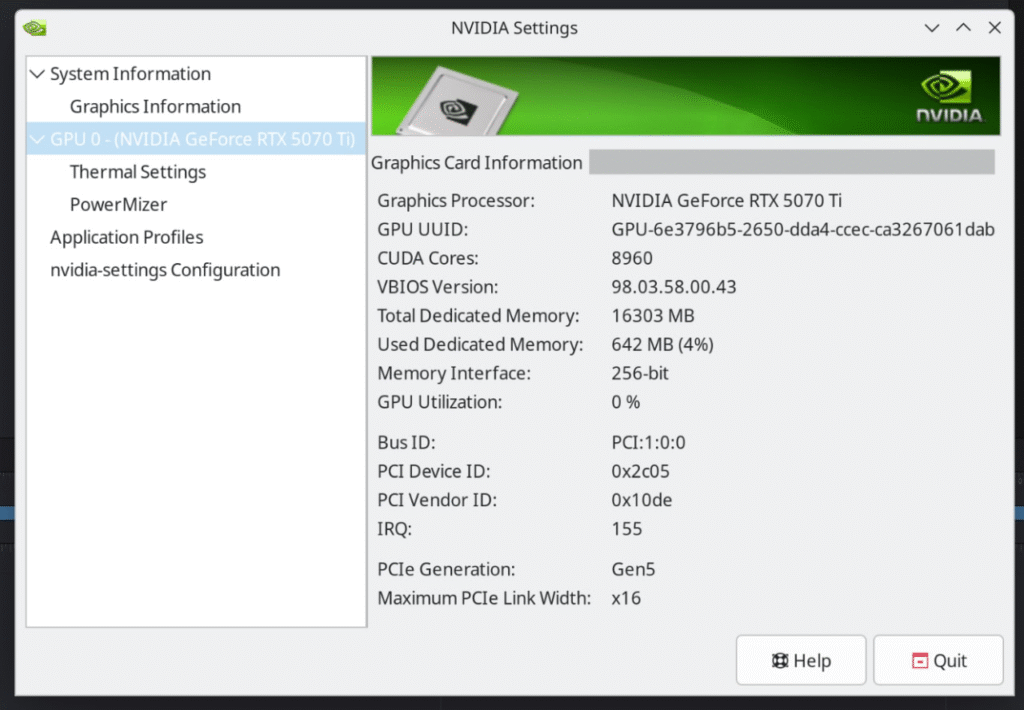
For me, I installed a 16 GB RTX 1070 Ti GPU, so there’s no way just simply opening a project will fill up the memory.
In fact, here is my GPU VRAM memory usage:
This is likely due to the display is using the HDMI port on the *motherboard* instead of using the HDMI output from the video graphics card. Please check to make sure that the computer monitor is plugged into the graphics card, and not the motherboard.
The integrated graphics on the motherboard don’t have enough RAM for DaVinci Resolve to be able to render its preview output while editing. Yes, DaVinci Resolve can still *talk* to the NVIDIA GPU for doing graphics encoding, but in order to *display* the video (such as to preview it while editing), it still must send the video to whatever graphics circuit that the monitor is plugged into, and in this case, I had the monitor plugged into the motherboard which was using the integrated graphics.
To resolve this, unplug the monitor from the motherboard and plug into the graphics card instead.
GPU fan turned off?
Turn on in the nvidia-settings:
sudo nvidia-settingsProblem: turning off the monitor breaks the display
Agh … this is the part I don’t have figured out yet. It has something to do with DPMS, and the best I can say for now is: do whatever is necessary to keep the monitor TURNED ON while the computer is running.
For me currently, if I do this:
- Monitor is plugged into the NVIDIA HDMI output on the graphics card.
- Boot up the computer. Display works fine.
- Log in. Look at my desktop.
- Turn OFF the monitor.
- Wait 5 seconds.
- Turn ON the monitor.
- And … only a black screen. No more signal from the graphics card.
- Perhaps the GPU lights and fans stop spinning too.
I’ll update this post when I figure this out, but all of the above – plus just keeping the monitor on at all times – should get you going to start editing video in DaVinci Resolve on Linux.
Problem: cannot play video
Another problem that I currently am still having is that no video would play outside of DaVinci Resolve. Even in DaVinci Resolve, playing a video on the timeline is very slow and just stutters so much to be unplayable.
Scrolling through the journalctl logs, I do see these messages:
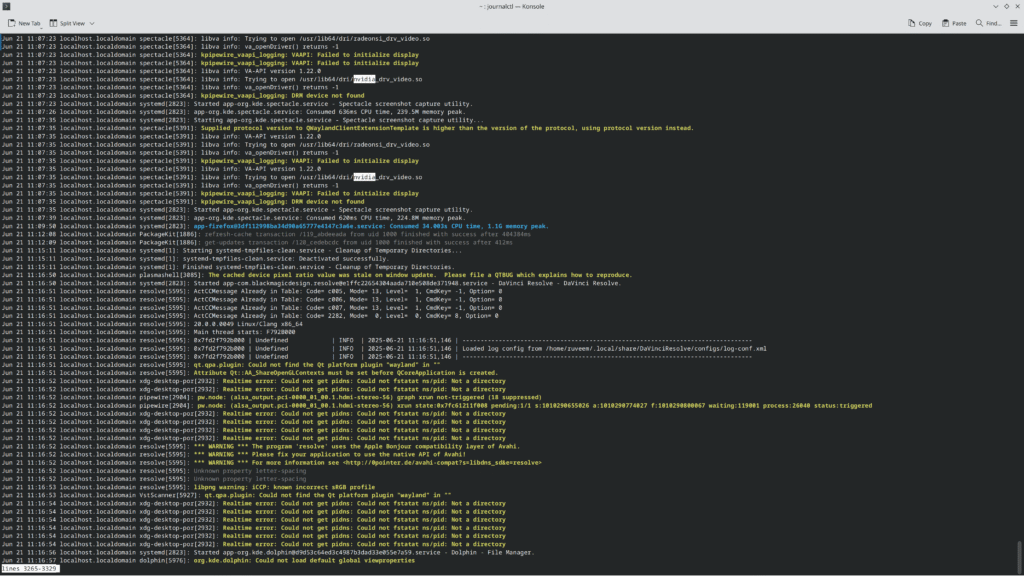
One of the messages says:
spectacle[5391]: libva_info: Trying to open /usr/lib64/dri/nvidia_drv_video.so
spectacle[5391]: libva_info: va_openDriver() returns -1
The correct return value for a successful va_openDriver() is the value 0 (success), but instead it’s returning -1 (unknown error).
The ‘spectacle’ is the screenshot utility, but I am guessing that nvidia_drv_video is a driver specifically for playing video using the GPU. I notice that no video can play. For me, mpv does not play video – sound plays, but the video canvas is just black. Websites depend: YouTube seems to still play, but a reel on Instagram was not playing for me, but it gave me an error.
The other item of interest on here is this:
resolve[5595]: qt.qpa.plugin: Could not find the Qt platform plugin "wayland" in ""I have yet to figure out what specifically this error message means or how to fix it, but I will update this post if I learn the answer. In the meantime, please let me know (email me) if you have any input for me on this or any clues. Thank you.
Any ideas on a screensaver to save the screen from burn-in?
LCD screens are less susceptible to burn-in than CRT or OLED screens, but, that being said, it makes me feel much more comfortable to have some sort of a screensaver. Googling this, it doesn’t seem like AlmaLinux currently supports a screensaver without first locking the device, but, thankfully, we have HTML to help us!
Create a new file like so:
vi ~/blank.htmlIn vim, enter paste mode (i.e., type: :set paste and hit Enter).
Copy-paste this HTML code into the file:
<!DOCTYPE HTML>
<html>
    <head>
        <meta http-equiv="content-type" content="text/html;charset=utf-8" />
        <title>Blank Page - No Cursor</title>
        <style type="text/css">
            html, body {
                width: 100%;
                height: 100%;
                color: white;
                margin: 0px;
                padding: 0px;
                text-align: center;
                vertical-align: middle;
                user-select: none;
            }
        </style>
        <script type="text/javascript">
            var cursorState = true;
            var helpHtml = "";
            function enterBlankScreen() {
                document.body.innerHTML = "";
                document.body.style.cursor = "none";
                document.documentElement.requestFullscreen();
                cursorState = false;
            }
            function exitBlankScreen() {
                document.body.innerHTML = helpHtml;
                document.body.style.cursor = "auto";
                document.exitFullscreen()
                .catch (err => {
                    console.log("Note: document was already not in fullscreen mode.");
                })
                cursorState = true;
            }
            function toggleScreenMode() {
                if (cursorState) {
                    enterBlankScreen();
                }
                else {
                    exitBlankScreen();
                }
            }
            function handleFullscreenEvent(event) {
                if (document.fullscreenElement == null) {
                    exitBlankScreen();
                }
            }
            function init() {
                helpHtml = document.body.innerHTML;
                window.addEventListener("fullscreenchange", handleFullscreenEvent);
                window.addEventListener("click", toggleScreenMode);
            }
        </script>
    </head>
    <body bgColor="black" onLoad="init();">
        <div style="padding: 100px;">
            Click the mouse anywhere to enter blank-screen mode;
            click again (or hit the Escape key) to return to normal.
        </div>
    </body>
</html>
For those unfamiliar with vim: hit ‘i’, and hit Shift + Insert, and hit Escape, then save and exit (:wq , then Enter).
The file should look like this:
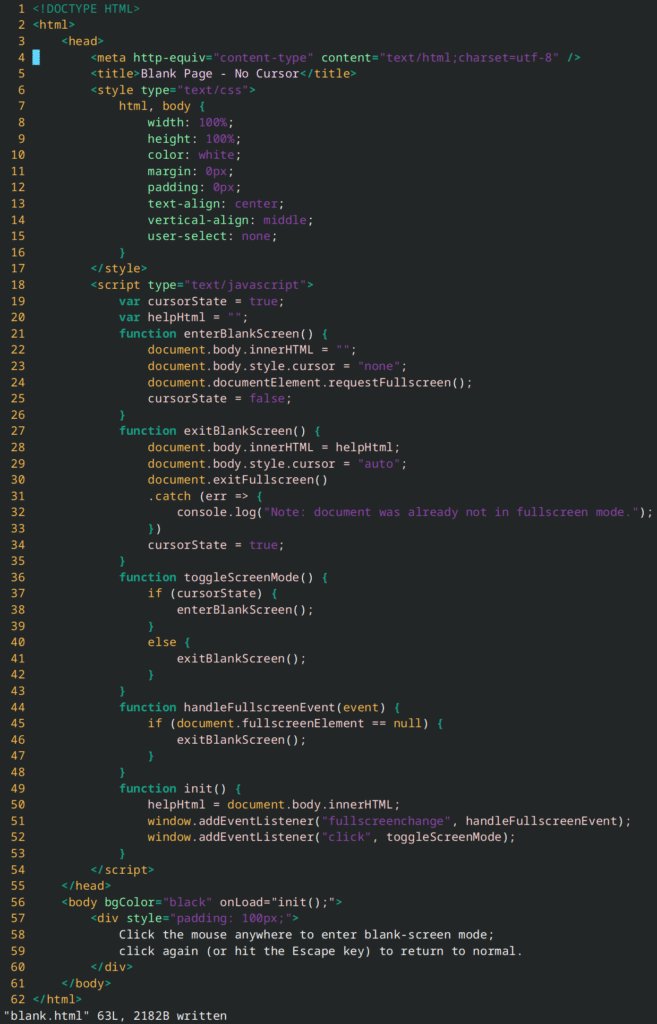
Open the file in Firefox, and you should see this:
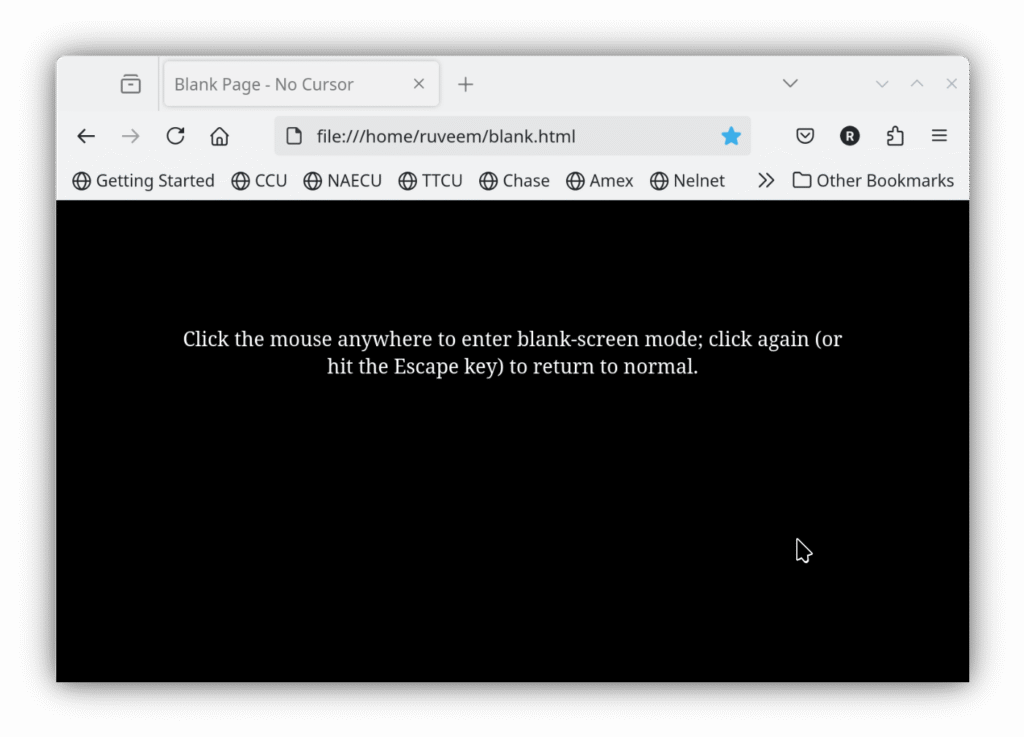
Use this window as a screensaver. Basically:
- Click inside the window to make it go fullscreen, hide the cursor, and hide the text. You will have a COMPLETELY BLACK SCREEN.
- Click again (or hit Escape) to return back to the normal mode with the text back, the cursor back, and the window not in fullscreen anymore.
This should allow to “turn off” the display without actually turning it off.
Note: please only leave your computer unlocked if you are confident about its physical security. I am not responsible for security violations or incidents that result from this. Please be responsible and don’t blame me. Thank you.
VIM and TMUX
Other useful software to install is tmux:
sudo dnf install tmuxTo be more useful, tmux can be configured:
vi ~/.tmux.confWith this tmux config:
set-option -g default-shell /bin/bash
set-window-option -g mode-keys vi
set -g mouse off
Likewise, vim can be configured:
vi ~/.vimrcWith this vim resource file:
scriptencoding utf-8
set encoding=utf-8
set autoindent
set number
set list
set listchars+=nbsp:-,tab:##
set listchars-=eol:$
set expandtab
set tabstop=4
set softtabstop=4
set shiftwidth=4
filetype plugin on
syntax on